You’ve been thinking about a sleeve for months—maybe years. You’ve saved images, imagined how it’ll look, and wondered if you’re ready to commit that much skin to one idea. The truth? A sleeve tattoo is one of the most rewarding projects you’ll ever wear, but only if you plan it right from the start.
Sleeves aren’t just bigger tattoos—they’re long-term design projects that require thought, patience, and collaboration with an artist who understands flow, proportion, and how your arm actually moves. Rush it, and you’ll end up with a disjointed mess. Plan it smart, and you’ll have a cohesive piece of art that tells your story for life.
This guide walks you through everything: how to choose a theme, pick placement, work with your artist across multiple sessions, and avoid the common mistakes that turn dream sleeves into regret sleeves.
Not every sleeve client comes in with the same vision or readiness level. Knowing where you stand helps you plan smarter and work better with your artist.
You’ve got a folder of reference images, a clear theme, and you want the whole design mapped out before session one. You value cohesion and want every element to fit a larger vision.
Your best move: Schedule a dedicated consultation to design the full sleeve with your artist before booking the first needle session. Bring references, discuss flow, and lock in the blueprint.
You want to start with one strong piece and add to it over time as inspiration allows. You like the idea of your sleeve growing organically, reflecting different chapters of your life.
Your best move: Choose a style and general theme upfront so future pieces connect naturally. Tell your artist you’re planning to expand later—they’ll design the foundation with room to grow.
You already have tattoos on your arm—maybe scattered pieces from different artists—and now you want to tie them together into a cohesive sleeve. You need someone who can unify existing work without starting over.
Your best move: Bring clear photos of your current ink to the consultation. A skilled artist can design background work, connecting elements, or filler that makes old tattoos feel like they were always part of the plan.
People throw these terms around like they’re obvious, but the distinctions matter when you’re planning your layout and budgeting time.
Pro tip: Don’t let the terminology box you in. Some of the best sleeves ignore these boundaries entirely—what matters is whether the design flows naturally across your arm and tells the story you want to tell.
There’s no single “right” way to build a sleeve. The approach you choose depends on your personality, how certain you are about the final vision, and how much flexibility you want along the way.
How it works: You and your artist design the entire sleeve before starting any ink. They create a full-arm stencil or digital mockup showing where every element sits. Each session executes a portion of the master plan.
Best for: Planners who want perfect cohesion and hate improvising. People doing traditional Japanese sleeves, biomechanical work, or intricate geometric patterns where every line has to connect.
Pros: Maximum visual flow. No awkward gaps or proportions. You know exactly what you’re getting.
Cons: Requires more upfront time and trust. Less room to pivot if your taste changes mid-project.
How it works: You establish a style and theme, then build the sleeve piece by piece over months or years. Each tattoo stands alone but connects through consistent aesthetic, color palette, or subject matter.
Best for: Evolvers who want their ink to reflect different life chapters. People building American Traditional or illustrative sleeves where individual images can live side-by-side.
Pros: Flexibility. Feels more personal and earned over time.
Cons: Risk of inconsistent sizing or awkward gaps if you don’t maintain a unifying thread. Requires discipline to stick to the theme.
Reality check: Most great sleeves fall somewhere in between. You might plan the anchor pieces up front, but leave breathing room for additions later. The key is choosing an artist who can work in both modes and adapt as your vision evolves.
A sleeve without a theme is just a random assortment of tattoos. The theme doesn’t have to be literal—it can be a mood, a color story, a style, or a narrative thread. But it needs to exist.
Narrative / Storytelling
Your life journey, mythology, a hero’s arc. Each element represents a chapter or milestone. Works especially well when you want the sleeve to feel like reading a visual autobiography. Storytelling through tattoos creates the deepest emotional connection.
Nature / Organic
Flora, fauna, landscapes, elements (water, fire, earth). These themes flow naturally around the arm’s curves and allow for beautiful negative space. Think forests wrapping the forearm, mountains climbing the shoulder.
Cultural / Heritage
Japanese irezumi, Polynesian tribal, Celtic knotwork, Chicano black-and-gray. These styles come with built-in visual languages and symbolic systems that make cohesion easier. Just make sure you’re honoring the culture, not appropriating it.
Abstract / Geometric
Sacred geometry, mandalas, linework, dotwork. Less about literal images, more about pattern, symmetry, and visual rhythm. Requires precision but ages beautifully when done right.
Mood / Aesthetic
Dark and moody, bright and playful, surreal and dreamlike. Sometimes the theme is just a vibe. Black and gray realism creates an incredible mood through shadow and contrast.
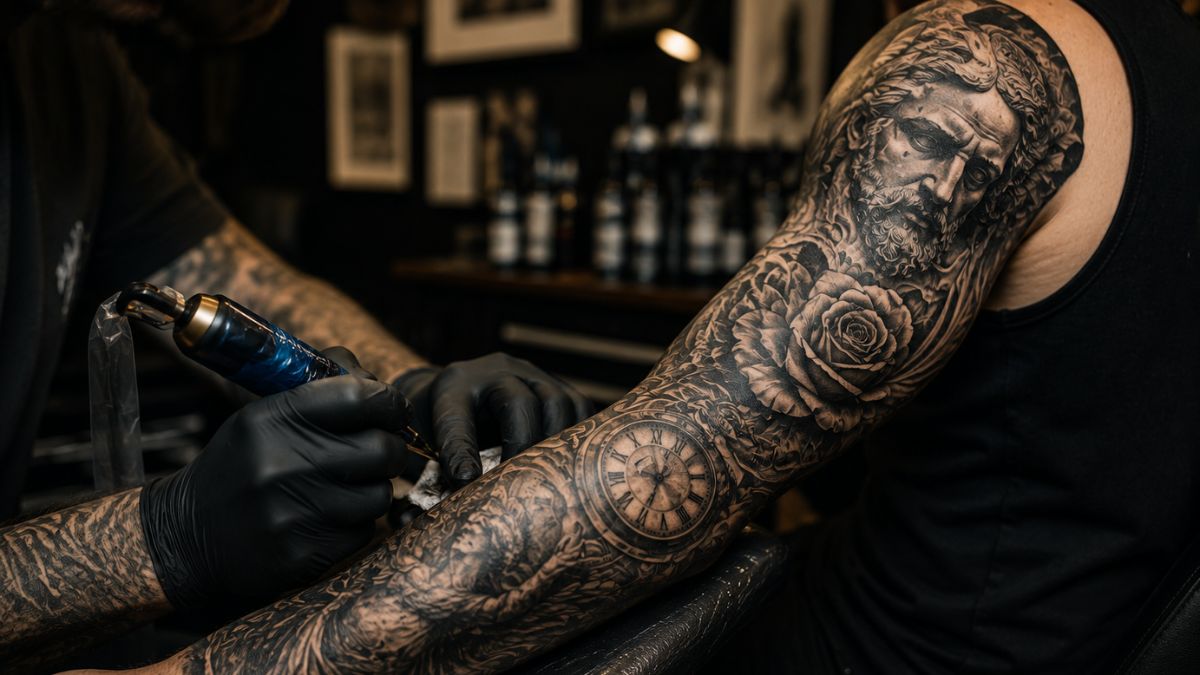
Your theme doesn’t have to be deep or philosophical—it just has to create a consistent visual language that makes every new addition feel like it belongs.
Your arm isn’t a flat canvas—it’s a three-dimensional surface with curves, muscles, joints, and movement. Smart placement considers how the design reads from multiple angles and how it flows with your body’s natural lines.
Shoulder Cap
Prime real estate for a central focal point—a face, skull, animal head, mandala. This is where the viewer’s eye lands first. Bold, symmetrical designs work best here. Avoid fine detail that’ll blur as the skin ages and stretches.
Upper Arm / Bicep
Curves around the muscle, so designs need to wrap smoothly. This is where supporting elements connect to the shoulder piece—wings spreading downward, waves flowing, and organic shapes extending. Consider how it looks flexed vs. relaxed.
Elbow Ditch
The inside bend of your elbow is notorious for being painful and prone to blowouts. Many artists use bold linework or geometric connectors here rather than delicate detail. Expect some distortion when your arm bends.
Forearm
The most visible part of your sleeve in daily life. This is where you can place secondary focal points or narrative elements that people will actually see and ask about. Flat enough for fine detail but still curves slightly—plan accordingly.
Wrist / Hand Transition
Where your sleeve ends matters. Some designs taper naturally to the wrist with flowing elements. Others stop cleanly at the wrist bone. A few brave souls extend onto the hand. Consider your job and lifestyle before committing to hand ink.
Pro tip: Your artist should take photos of your arm from multiple angles during the design phase. What looks perfect from one view might look awkward when your arm rotates. Test the stencil placement before committing.
You can’t bang out a full sleeve in one sitting. Your skin needs time to heal, your artist needs time to prep each section, and frankly, most people can’t sit still for 20+ hours straight. Here’s how to structure the journey without it dragging on forever.
Consultation
Design the blueprint
Foundation Session
4–6 hours, outline + key elements
Healing Break
3–6 weeks between sessions
Fill Sessions
2–6 more sessions, shading + color
Final Touchup
Polish details after full healing
Book your next session before you leave. Don’t wait until you’ve healed to schedule—you’ll lose momentum, and your artist’s calendar fills up fast. Most shops let you book 2–3 sessions ahead.
Avoid summer for heavy sessions. Healing fresh ink in Athens heat and humidity sucks. Schedule big work for fall or winter when you can keep it covered and avoid sun exposure.
Budget time. Each session needs a day off afterward for rest. Don’t schedule a sleeve session the day before a big work presentation or weekend trip.
Communicate if life gets in the way. If you need to pause the project for a few months, tell your artist. They’d rather you finish strong than ghost halfway through.
Non-negotiable: Do not get tattooed by different artists mid-sleeve unless the original artist explicitly hands off the project. Switching artists creates inconsistent line quality, shading styles, and color saturation that’ll be visible forever.
These aren’t small missteps—they’re project-killers that turn great ideas into permanent regrets. Learn from other people’s failures.
🚩
Picking an artist based on availability instead of portfolio
You’ll wear this for life. Choose the right artist based on their sleeve experience and style match.
🚩
Not leaving room for future expansion.n
You might think you’re done, but most people add more over time. Design with breathing room and natural extension points so future pieces fit organically.
🚩
Going too small or too detailed
Fine lines blur over time. Tiny details blob together. What looks crisp at 25 will look muddy at 45. Trust your artist when they say to size up or simplify.
🚩
Ignoring your artist’s placement advice
They know how skin moves, stretches, and ages. When they suggest moving something an inch or flipping the orientation, it’s not arbitrary—it’s decades of experience talking.
🚩
Neglecting aftercare between sessions
Poor healing affects how well future sessions take ink. If you half-ass aftercare, you’ll need more touchups, and the final result won’t look as clean.
A full sleeve typically takes 20 to 40 hours of work, spread across 4 to 8 sessions scheduled 3 to 6 weeks apart. The timeline depends on design complexity, your pain tolerance, and how well your skin heals between sessions. Most clients complete a sleeve over 6 to 12 months.
Both approaches work. Some clients plan every detail upfront for perfect cohesion. Others start with a foundation piece and add elements organically over time. The key is establishing a style, color palette, and theme early so future additions flow naturally rather than looking like a random collection.
A half sleeve covers the shoulder to elbow (upper) or elbow to wrist (lower), taking 10 to 20 hours. A full sleeve runs from the shoulder to wrist in one continuous design, requiring 20 to 40 hours. Three-quarter sleeves stop mid-forearm. Your choice depends on your commitment level and how visible you want the work.
Absolutely. Many sleeves start with a standalone piece and grow over time. A skilled artist can design connecting elements, background work, or filler that unifies old and new ink into a cohesive sleeve. Bring photos of your existing work to your consultation so the artist can plan integration.
Japanese, American Traditional, black and gray realism, neo-traditional, and geometric styles are all sleeve-friendly because they flow well across curved surfaces and allow for balanced composition. The best style is the one that resonates with your story and works with your arm’s natural contours.
At Curly’s Tattoo Parlor in Athens, we’ve built hundreds of sleeves that clients wear with pride for decades. Whether you’re ready to start now or just want to talk through your ideas, we’ll give you honest guidance without the sales pitch.
Explore all our tattoo services or browse more tattoo guides to keep learning


